Follow‑along guide
Steps done0 / 6
Vibe Coding · Beginner Workshop

From Idea to Website:
Vibe Coding for Beginners

Today you'll build your first real website, just by describing what you want in plain English. No experience needed. Follow each step in order, and check it off as you go.

TIME ≈ 90 minBUILD portfolio or business siteNEED a laptop + tools + ai model
Tap the circle beside each step to check it off as you finish.
Before you start

Install these tools first

Before you start building your project, please make sure you have all these apps installed. They’re all free — when in doubt, keep the default options on every screen.

01OpenCode (desktop)
run open-source AI models

We use OpenCode — an open-source AI coding agent that works in the terminal, desktop app, and IDE extensions. For this workshop, install the desktop app (beta).

Download OpenCode Desktop
WindowsFrom the download page, get Windows (x64), run the installer, and launch OpenCode from the Start menu.
macOSDownload the build for your chip (Apple Silicon or Intel), open the installer, and drag OpenCode into Applications. Allow the app on first launch if macOS asks.
LinuxDownload .deb or .rpm from the download page and install with your package manager.
Optional: OpenCode also ships as a terminal app: curl -fsSL https://opencode.ai/install | bash. The desktop app is enough for today.
I have OpenCode (desktop) installed
02Node.js
run website tools locally

Node.js lets your computer run the development tools used by modern websites. We need it for project setup, previews, and package commands.

Download Node.js
WindowsOpen nodejs.org/en/download, download the Windows installer, run it, and keep the default options.
macOSOpen nodejs.org/en/download, download the macOS installer, run it, and keep the default options.
LinuxUse the Linux instructions on the download page for your distribution, or install Node.js with your package manager.
I have Node.js installed
03Git
to save your work to GitHub

Git is for code versioning — like having a backup of your code. We'll also use it to upload your website to GitHub (step 1).

Download Git
WindowsOpen git-scm.com/install/windows, download the installer, and run it — keep the default options on every screen.
macOSGit is usually already there. To check, open Terminal and run git --version; if it's missing, macOS offers to install it for you.
I have Git installed
04VS Code
your code editor

Visual Studio Code is a free editor where you can open and look at the website files you build.

Download VS Code
WindowsOpen code.visualstudio.com, click Download for Windows, run the installer, and keep the default options.
macOSDownload, unzip, and drag Visual Studio Code into Applications.
I have VS Code installed
The 7 steps
01

Create a GitHub account

GitHub is where we'll store the website you build today. A free account is all you need — we'll push your project there during the workshop so you can keep it and share it.

  • Go to github.com/signup
  • Enter your email, create a password, and choose a username (this becomes part of your public profile URL)
  • Complete the verification puzzle or code GitHub sends to your email
  • Answer the short setup questions (you can skip optional steps — the Free tier is fine)
  • Verify your email address if GitHub asks you to confirm from your inbox
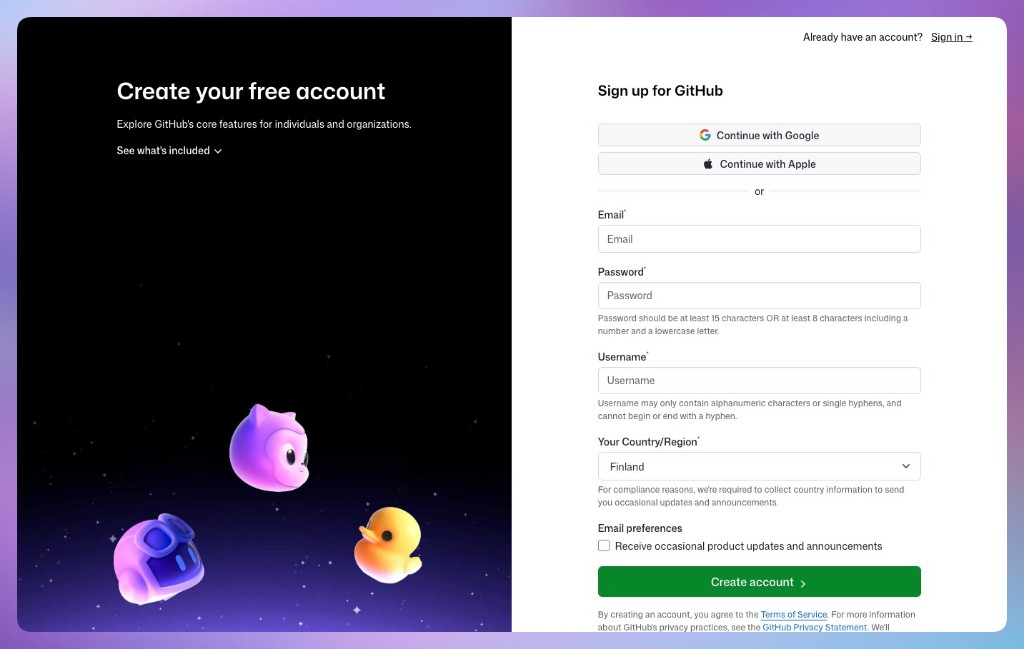
GitHub sign-up page with email, password, username, and country fields
GitHub sign-up form — enter your email, password, and username, then click Create account.

Your finished project will live in a GitHub repository (a project folder in the cloud). That lets you save your work, open it on another computer, and deploy it to Vercel.

TipAlready have an account? Sign in at github.com/login and make sure you know your username and password (or how you sign in with Google/Apple).
02

Create a Vercel account

Vercel publishes your site to the internet and gives you a shareable link (e.g. your-site.vercel.app). The free Hobby plan is enough for today's one-page site.

  • Go to vercel.com/signup
  • Click Continue with GitHub — this is the easiest path since you already created a GitHub account in step 1
  • Authorize Vercel when GitHub asks (Vercel needs permission to read your repos and deploy from them)
  • Finish Vercel's short onboarding (team name can be your name; choose the free Hobby plan)
  • You should land on the Vercel Dashboard — you're ready; we'll deploy your site together during the workshop
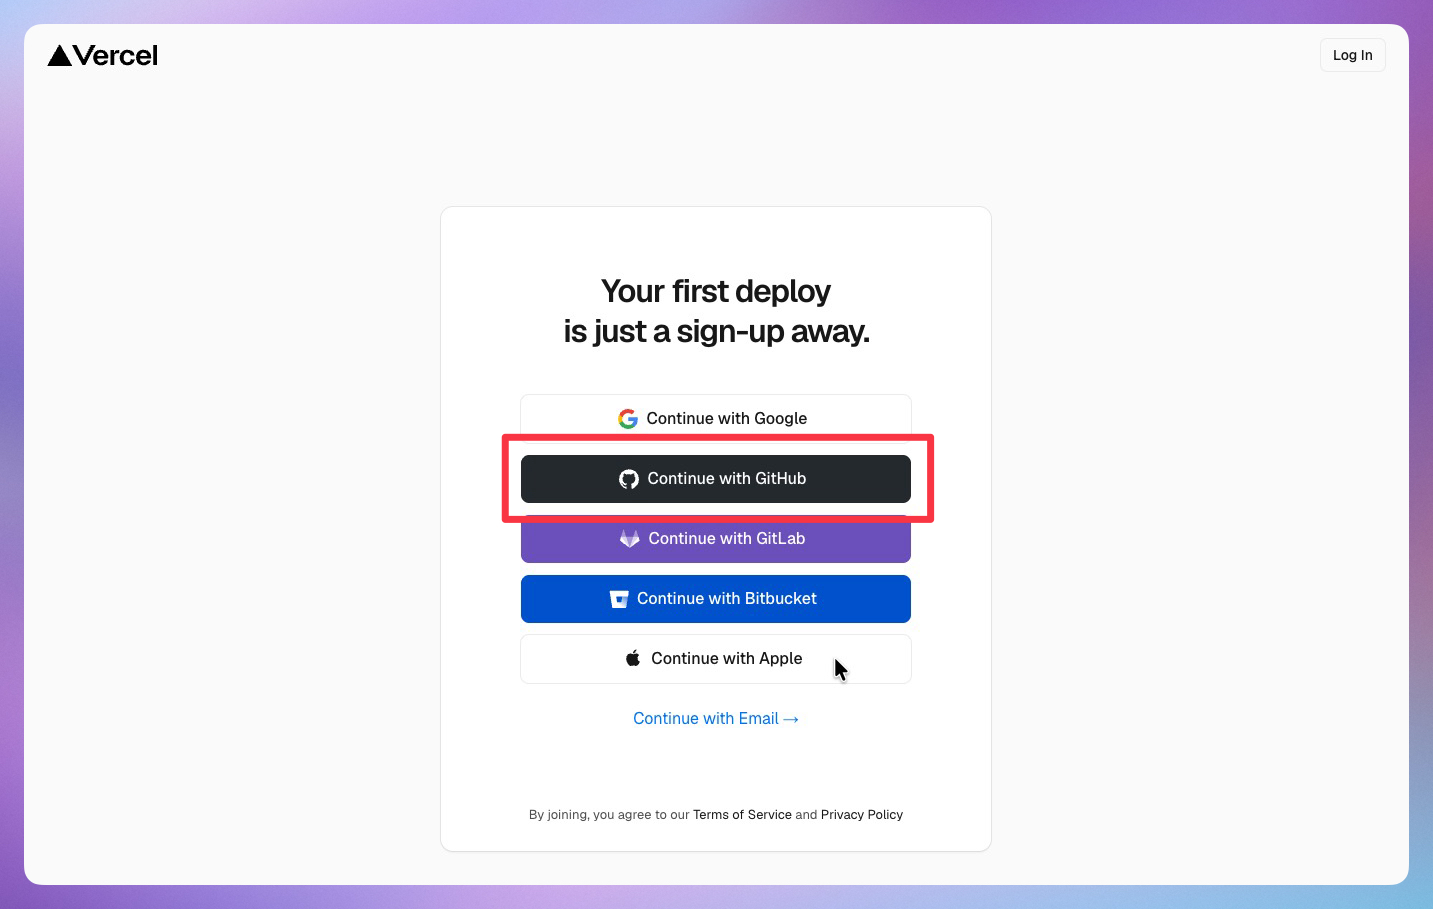
Vercel sign-up page with Continue with GitHub and other provider buttons
Vercel sign-up — click Continue with GitHub to register with the account you created in step 1.

After you build your site with OpenCode, we'll put it on GitHub and import that repo into Vercel. Vercel will build and host it — you'll get a live URL to open on your phone and share with others.

TipDon't paste secrets. Never commit passwords or API keys to GitHub or add them to your website files.
03

Sign in to GitHub in VS Code

Connect VS Code to the GitHub account you created so it can publish and sync your project from the editor.

  • Open VS Code
  • Click the Accounts icon in the lower-left corner
  • Choose Sign in with GitHub
  • Follow the browser prompts and authorize Visual Studio Code
  • Return to VS Code and confirm your GitHub username appears under Accounts
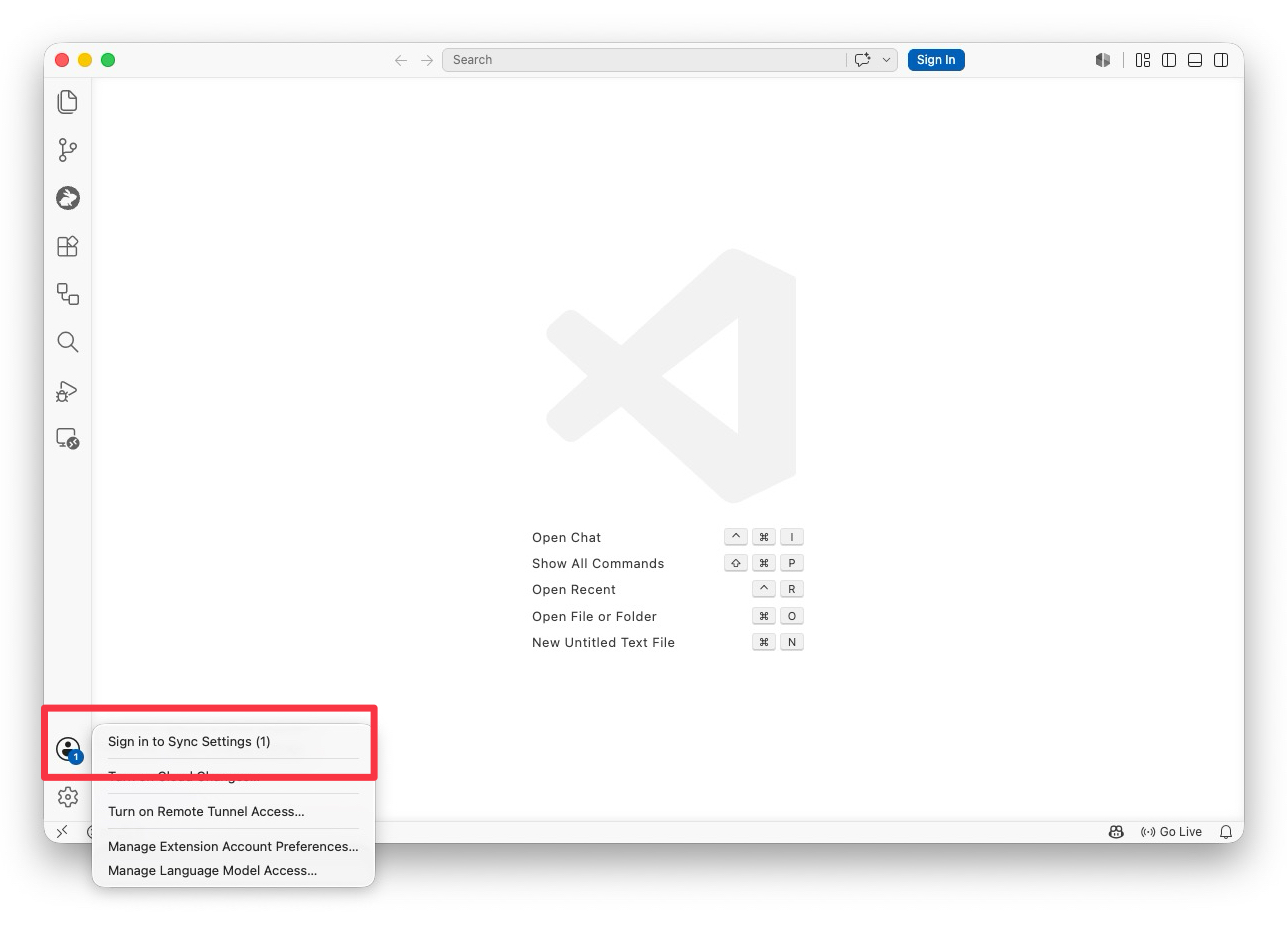
VS Code Accounts menu showing Sign in with GitHub
VS Code sign-in — open Accounts and choose Sign in with GitHub.
TipUse the same GitHub account from step 1. If a browser window opens, approve the VS Code authorization and return to the editor when it finishes.
04

Build your prompt

Use the interactive prompt builder to answer a few questions about the website you want to build. It will write a personalized PRD prompt you can paste into ChatGPT: no guesswork, just fill in the blanks.

Open Prompt Builder
TipThe builder covers 5 website types with guided questions specific to each. It asks for a PRD only, not code, perfect for the workshop.
05

Look, then refine

First build won't look as you've imagined it, so refine it by giving feedback to the AI. Change one thing at a time so you can see what each request does.

Make the headline bigger and use a warm cream background.
Add a Contact section with my email and a button.
The text is hard to read on phones, please fix the spacing.
TipIf something breaks, tell the AI exactly what looks wrong. If there's an error, copy and paste the error code and ask the AI to fix it. It can usually fix it in one try.
06

Add your real content

Swap the placeholder words and pictures for the real thing. Paste your actual text, and upload your assets like images to your project folder.

  • Replace the placeholder text with your real words
  • Upload your logo or photos, or ask where to add them
  • Ask it to tidy anything that shifted after your edits
Prompt · Add content
Update the About section with this text:
[paste your bio].
Replace the placeholder images with the photos I
uploaded. Keep the same layout and style.
TipNo photos handy? Grab free stock photos from Unsplash and Pexels and swap them in later.
07

Deploy your website in Vercel

Import your GitHub website project into Vercel and deploy it so you get a public link you can share.

  • Go to vercel.com and log in to your account
  • Click Add New, then select Project
  • Under Import Git Repository, select your website project
  • Click Import, keep the default settings, then click Deploy
  • When deployment finishes, copy the live URL and open it to test your site
TipChoose the GitHub repository for the website you built in this workshop. After deployment finishes, open the Vercel URL in a private window to make sure it works.
Mchael Poncardas